
Getting to Know: Mix2Mold® Ceramic Resin
Welcome, crafters! Whether you're an experienced artist seeking a new medium or just looking for a delightful afternoon activity, Brea Reese's Mix2Mold ceramic resin is here to spark your creativity. In this blog post, we'll guide you through the exciting process of crafting one-of-a-kind home decor pieces. Join us as we explore the endless possibilities of Mix2Mold – a non-toxic and user-friendly medium that guarantees a carefree crafting experience. Let's dive into the world of Mix2Mold and create something magical!

Getting Started with Supplies:
Before we dive into the creative process, let's gather our supplies:

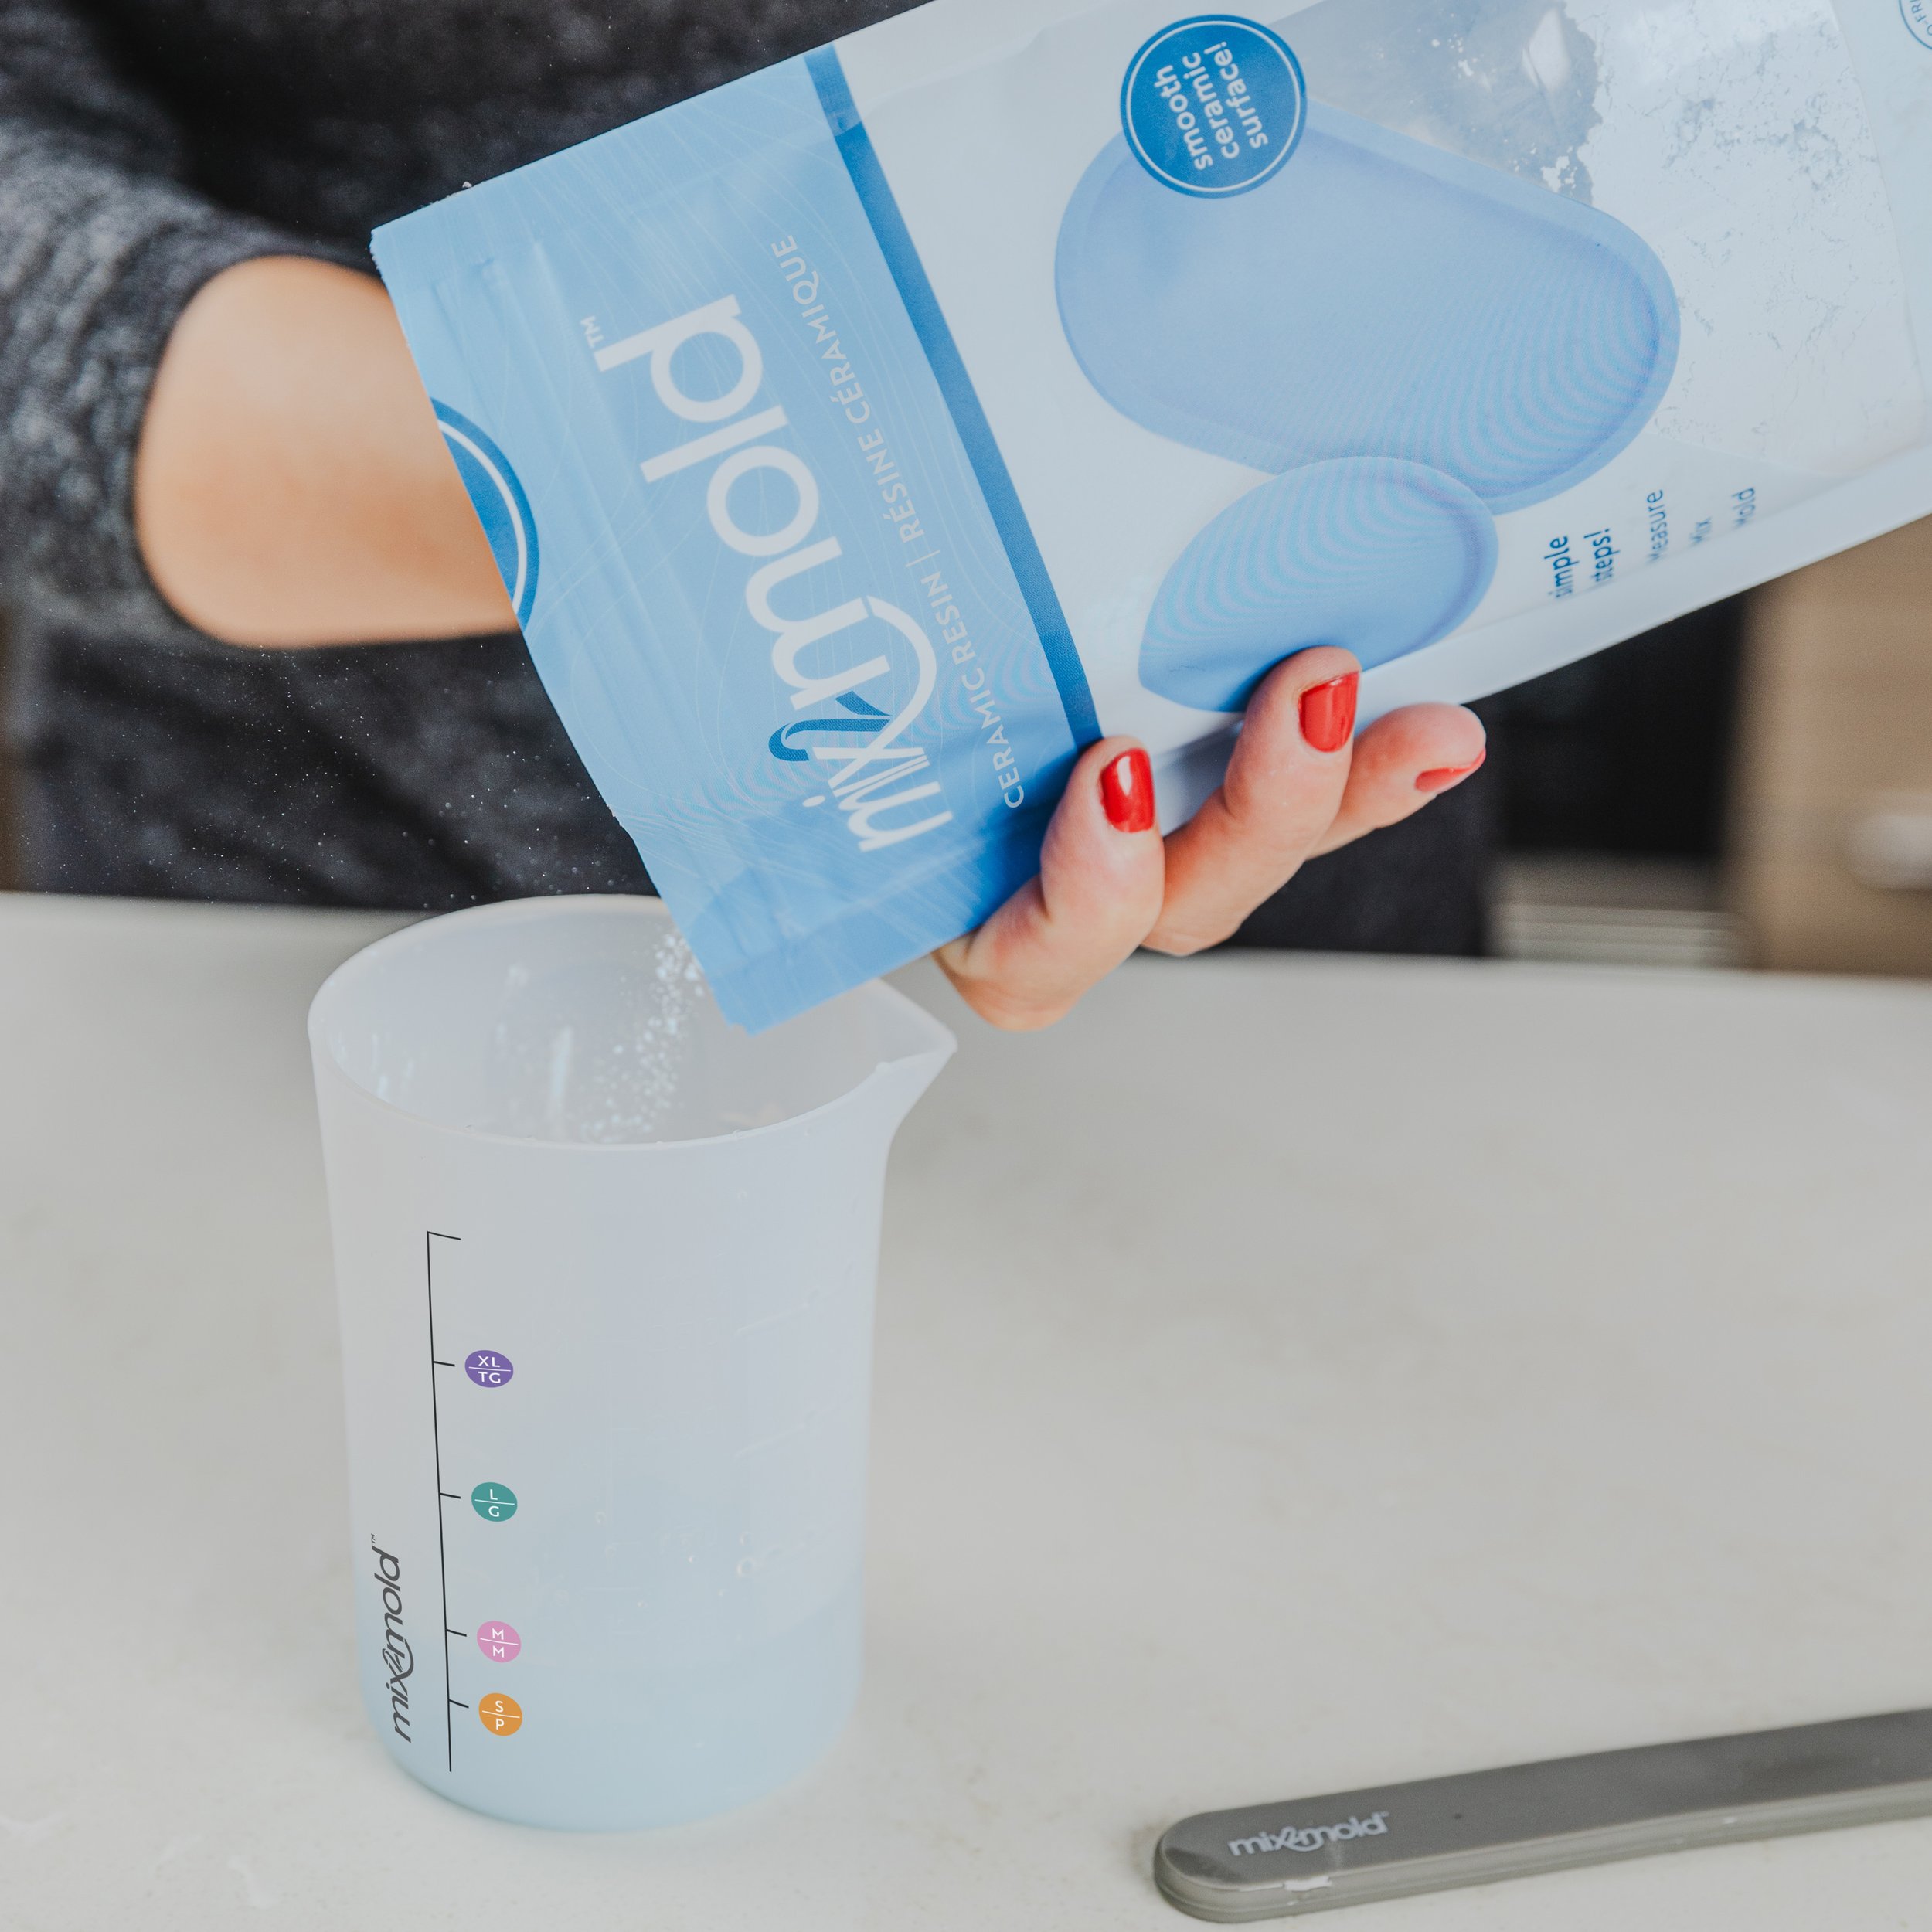
Mix2Mold ceramic powder
Mixing cup
Measuring cup
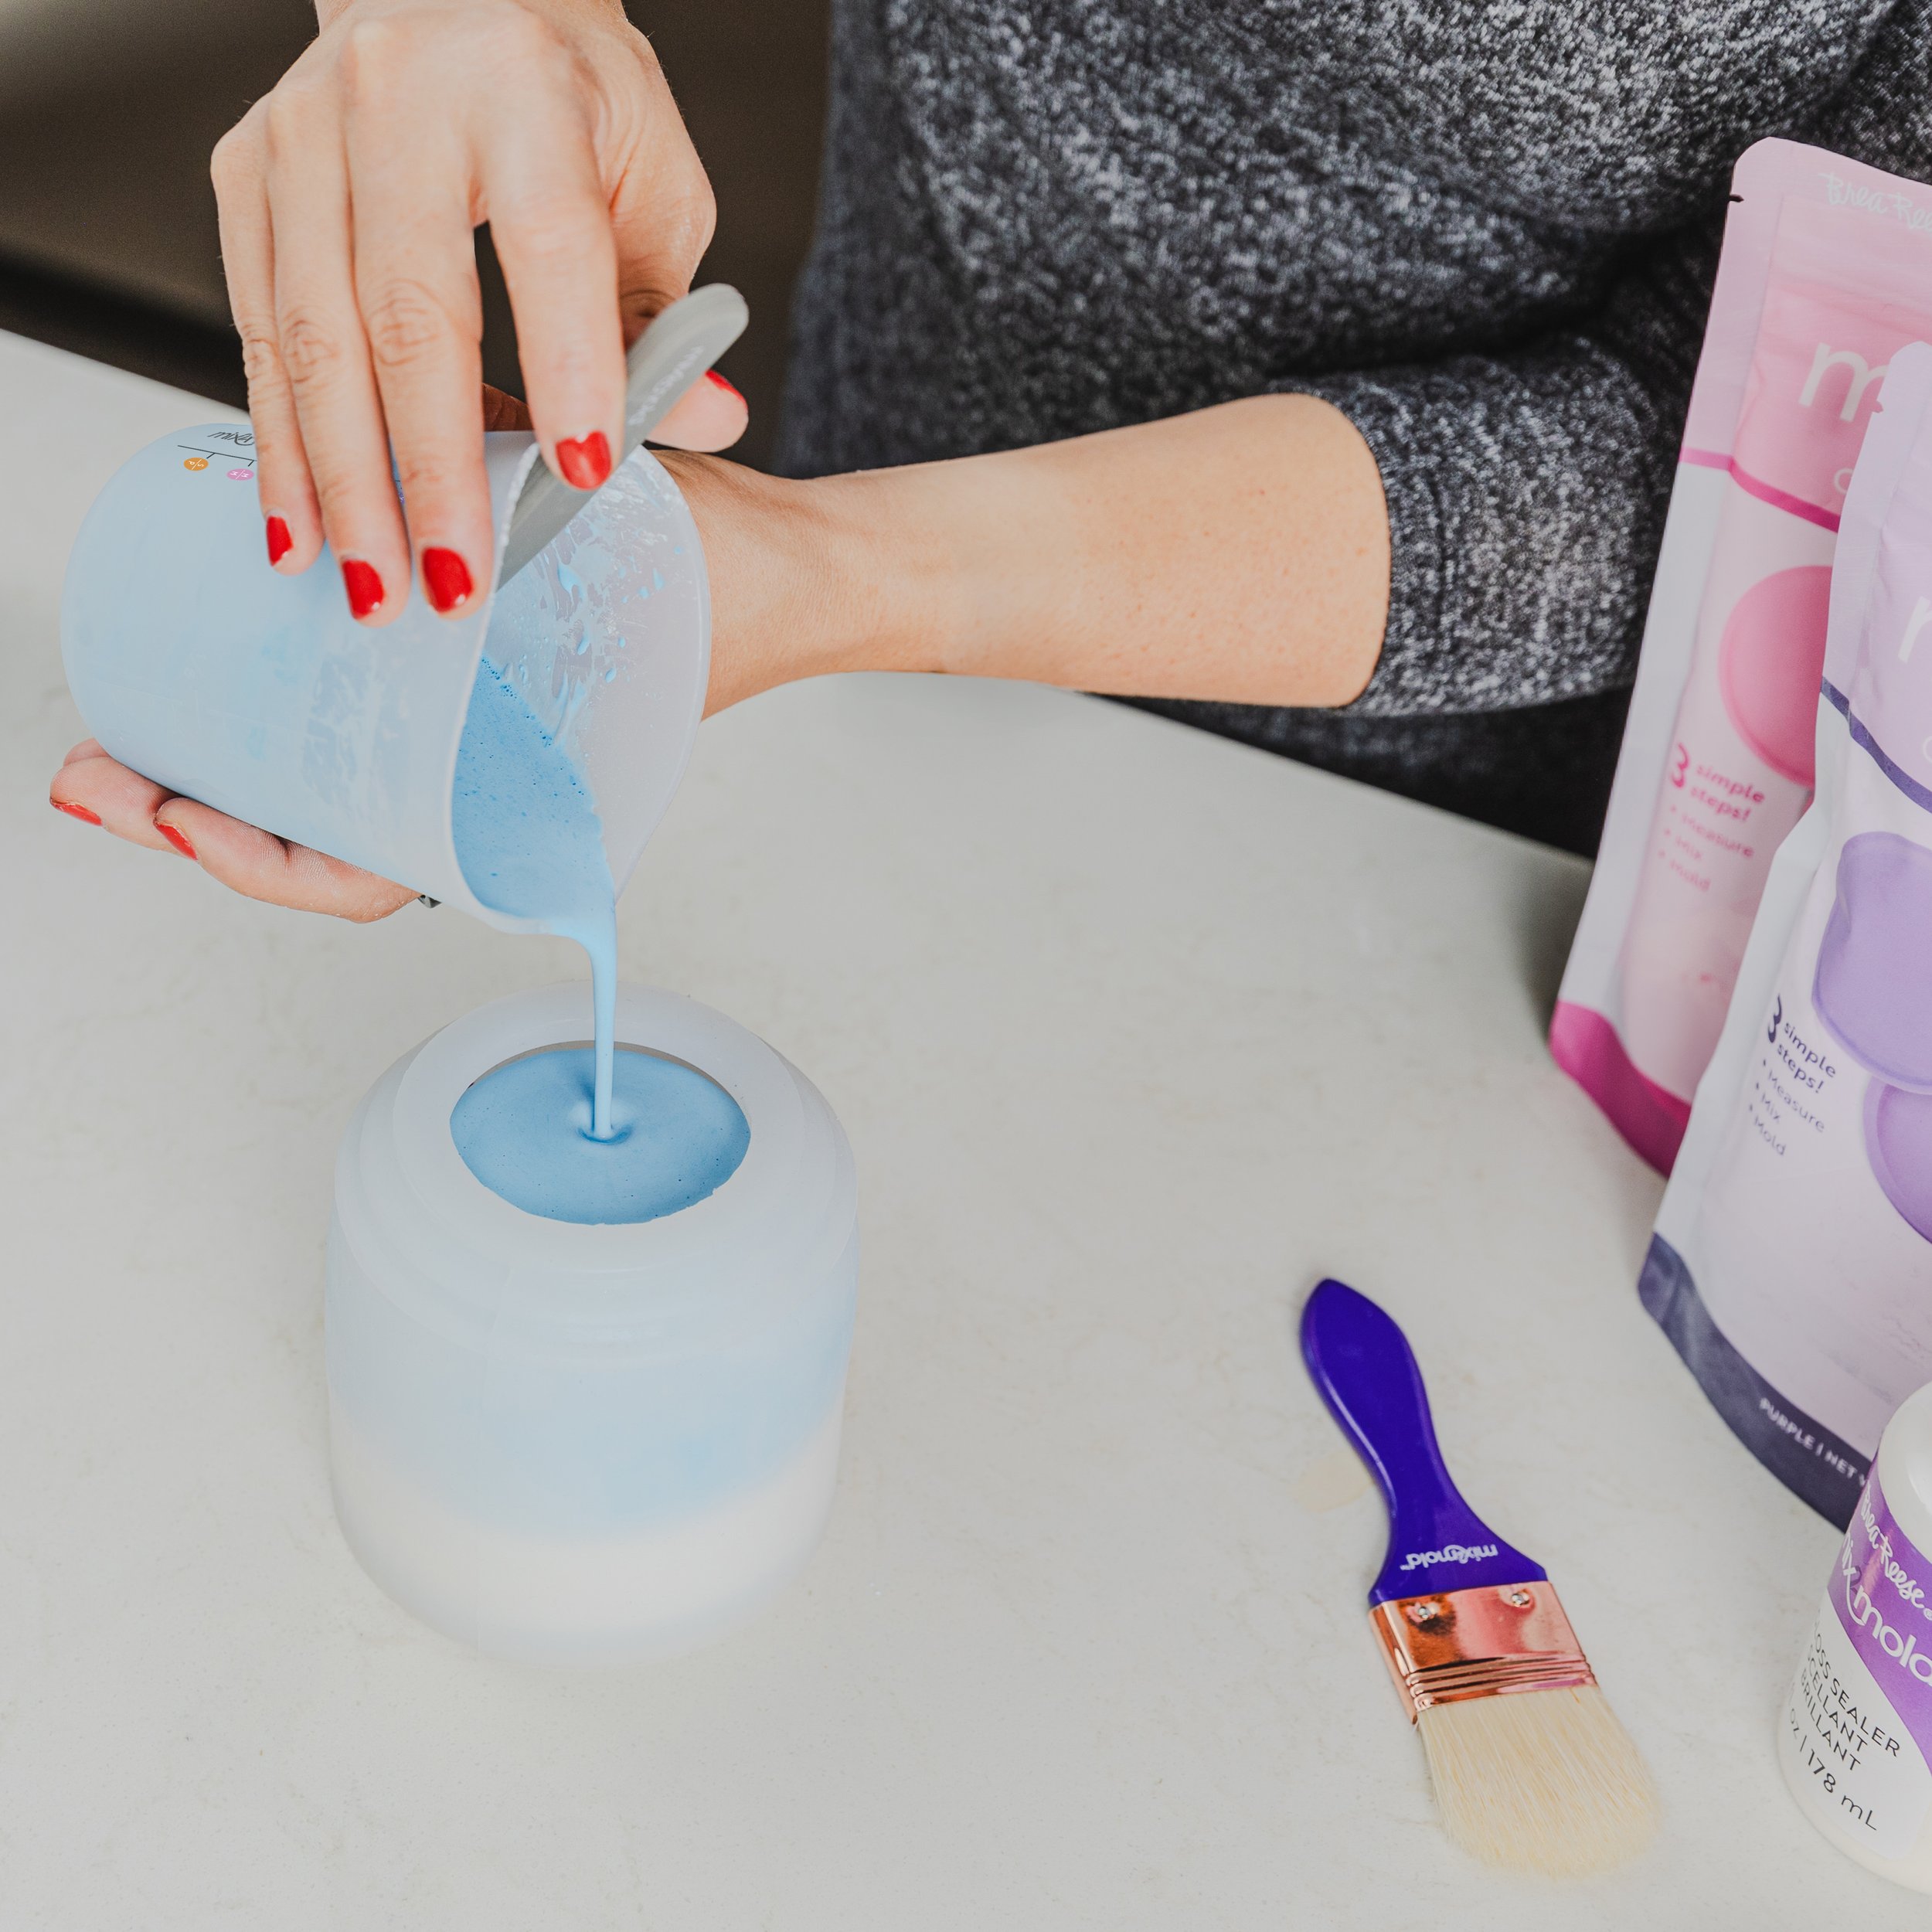
Silicone Mold (your choice)
Stir stick (popsicle stick, silicone spatula, whisk, etc.)
Water
Mix2Mold acrylic pigments
Sandpaper
Mix2Mold Sealer (gloss or matte)
Paper towels (for clean up)
Optional Supplies:
Terrazzo Chips
Gold Leaf
Glitter
Setting Up Your Crafting Space:
Create a comfortable workspace at a dining room table or kitchen counter. Ensure all supplies are easily accessible for a seamless crafting experience.
Mixing the Mix2Mold:
Measure the required amount of Mix2Mold ceramic powder into the mixing cup, following the 3:1 ratio (three parts powder to one part water). Add room-temperature water and stir until you’ve achieved a smooth, batter-like consistency. Take advantage of Mix2Mold's 7-8 minute work time to refine your design.

Personalizing Your Mix2Mold Project:
Now, the fun part begins, explore various customization options:
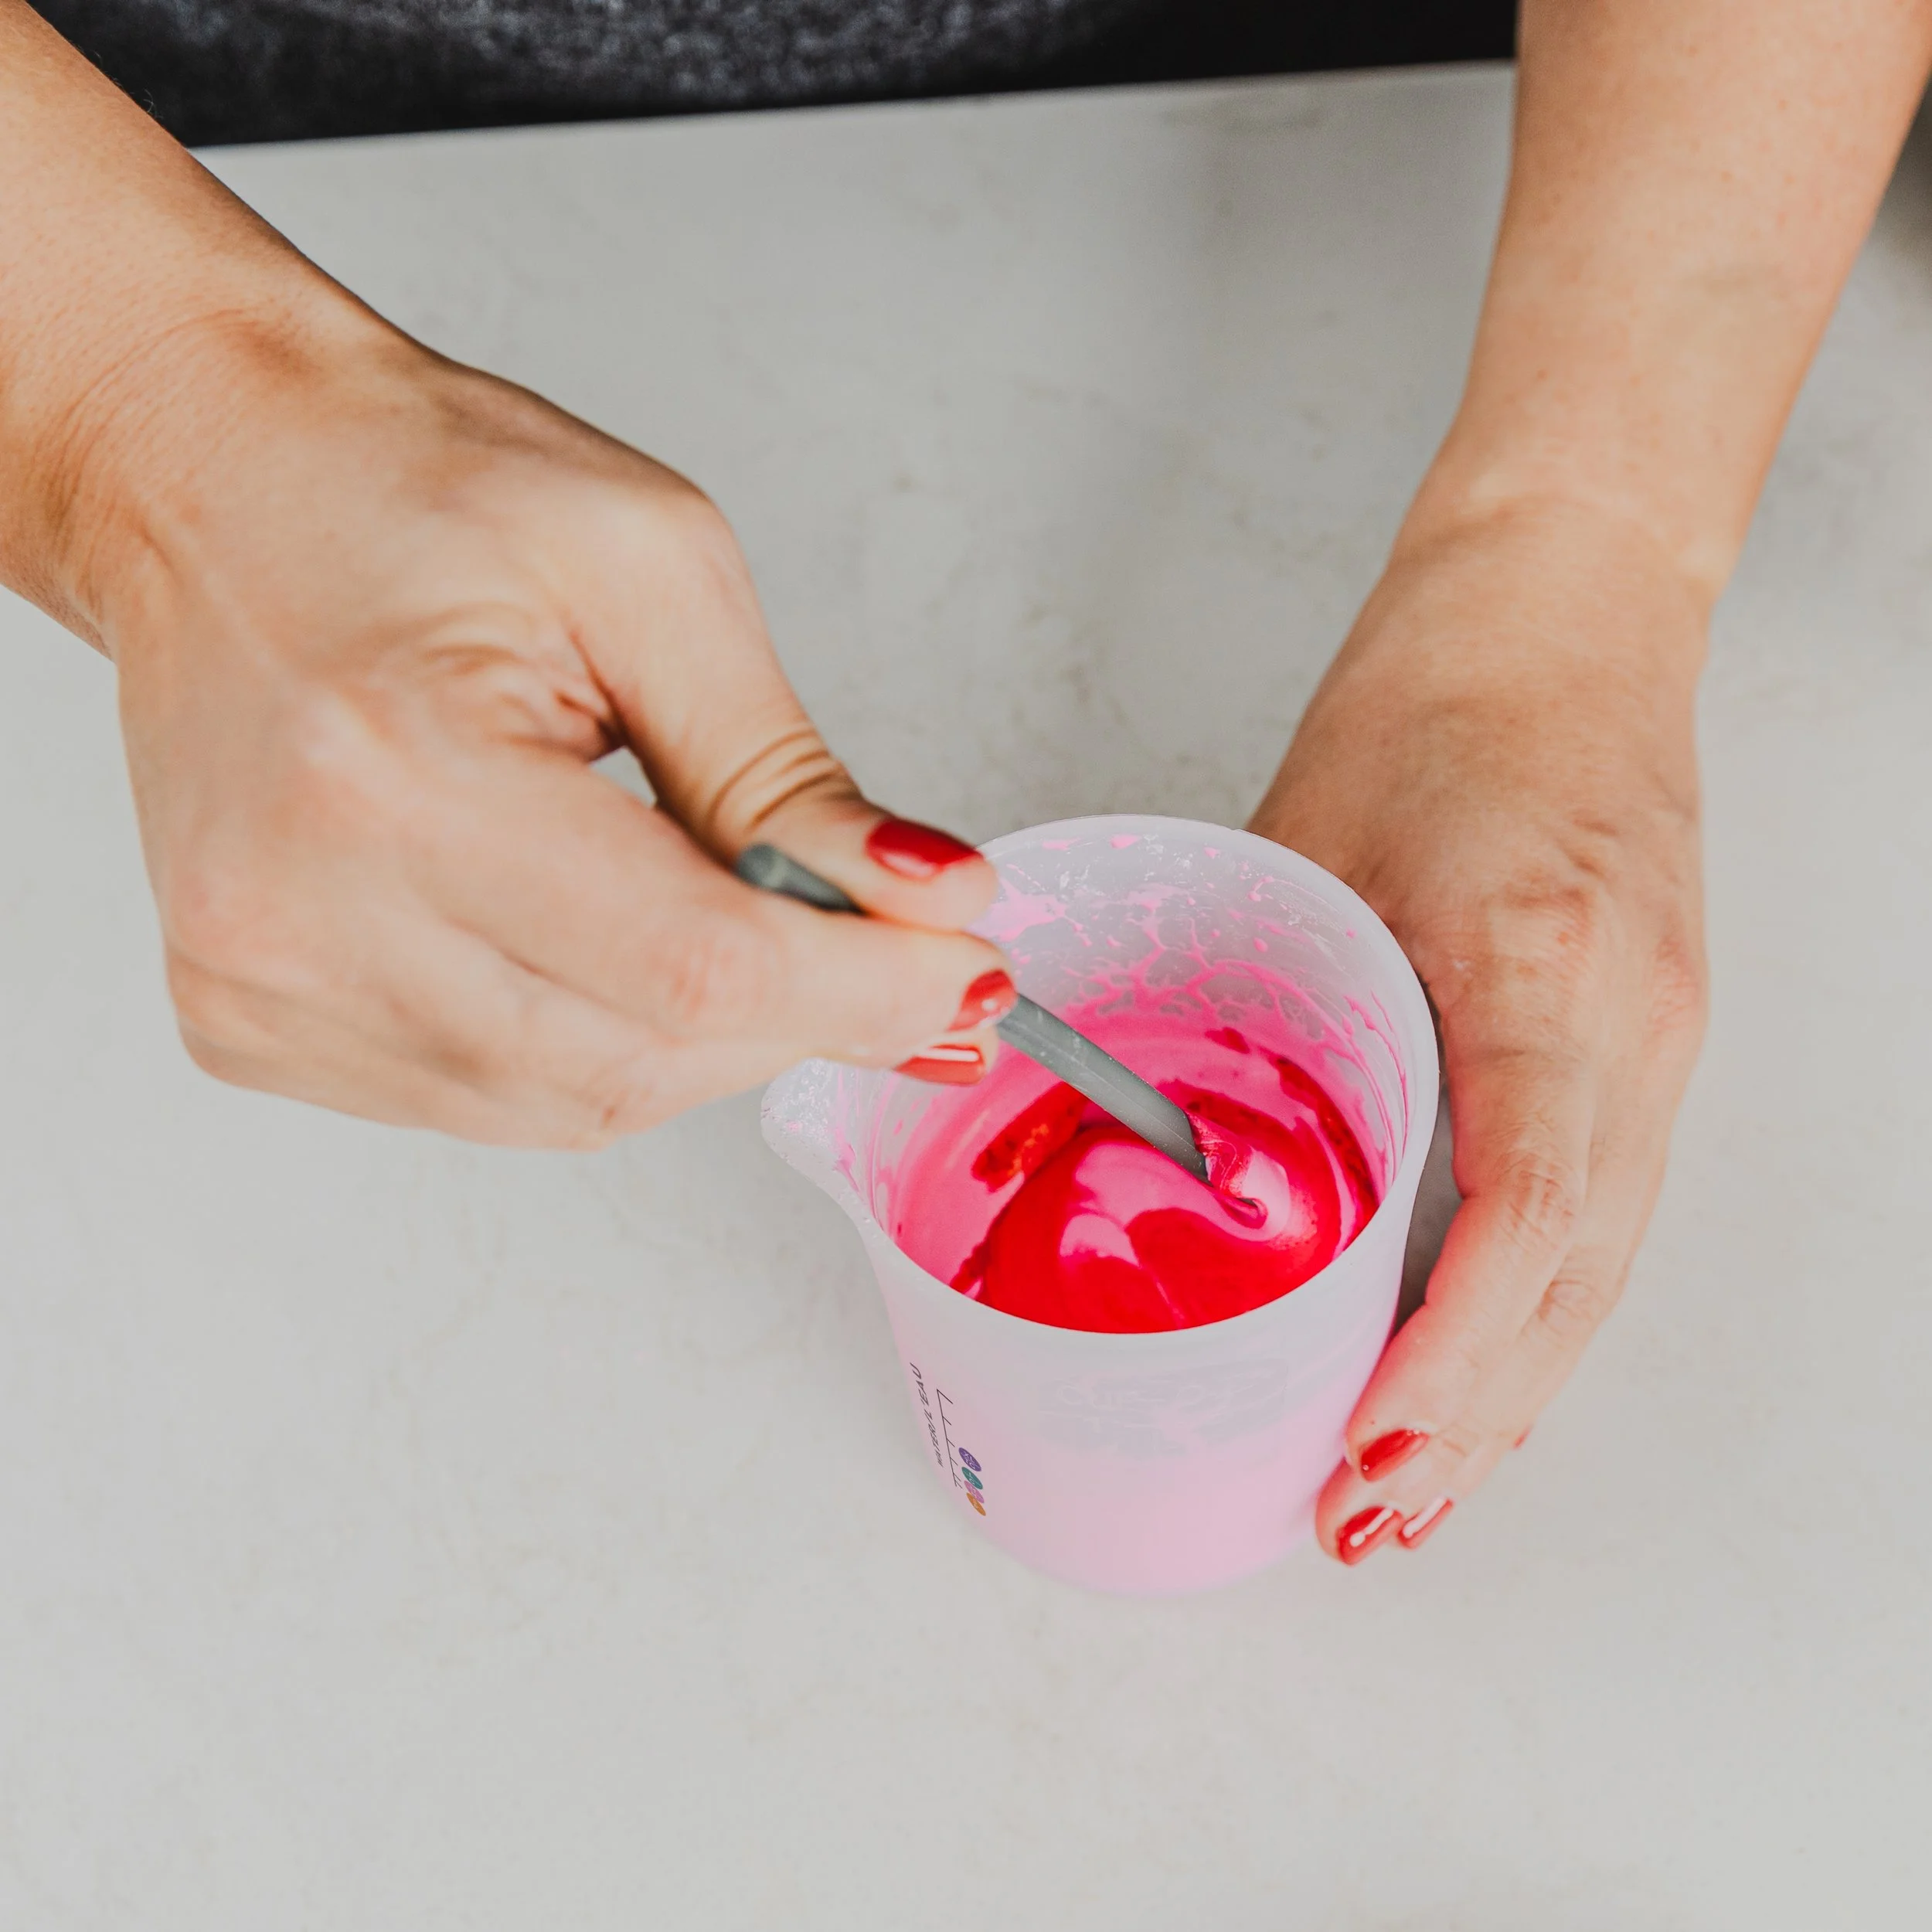
Full Pigment Coloration: Slowly add Mix2Mold pigments to transform the color. Add small amounts at a time to avoid over-saturation.
Marble Effect: Add pigment to a small portion of the mixture. Swirl it into the main Mix2Mold batch for a stunning result.
Terrazzo Chips: Mix2Mold's premade terrazzo chips to the mixture for a unique texture that will enhance your creation.
Gold Leaf Accent: Add a touch of glamour by placing small gold leaf pieces in the silicone mold before adding Mix2Mold.
Pouring and Curing:
Pour your Mix2Mold into the silicone mold, ensuring every bit is utilized. Tap the mold's sides to release any air bubbles. Now, the anticipation begins as Mix2Mold cures within 60 minutes.
De-Molding and Final Touches:
After patiently waiting, gently peel away the silicone to reveal your creation. Sand down any rough edges and, if needed, add felt or cork for practicality. The big reveal is your favorite part – relish the satisfaction of seeing your unique creation!
Sealing the Enchantment:
Apply a coat of Mix2Mold sealer (gloss or matte) with a paintbrush. Allow your masterpiece to fully cure for 24 hours before use.

Display your Mix2Mold Masterpiece!
Working with Mix2Mold offers a world of possibilities, which allows your creativity to flourish. Embrace the uniqueness of each project and enjoy the flexibility to experiment with new ideas. How did your Mix2Mold creation turn out? Share your fantastic results and let the crafting adventure continue!
Make sure to share your Mix2Mold creations on social media and tag us @breareeseart or use #mix2mold